Rocks and Erosion: How Land Changes Shape
Why some rocks scratch and some fizz, how a trickle of water carves a canyon, what keeps a hillside in place, and how a boulder ends up as sand. Four hands-on lessons on rocks, weathering and erosion.
Or try any 3 lessons free with an account.
Already bought it? Download the whole unit as one printable workbook: cover, contents, curriculum connections, every lesson, readings, practice pages, a unit test and an answer key, in black and white.
4 lessons in this unit
 Lesson 1 · 50–60 minAre all rocks the same?Students sort a set of rocks by what they can see, then test them like geologists with a scratch test, a streak test and a drop of vinegar. They use their results to sort the rocks again and back up a claim about which rock is limestone.
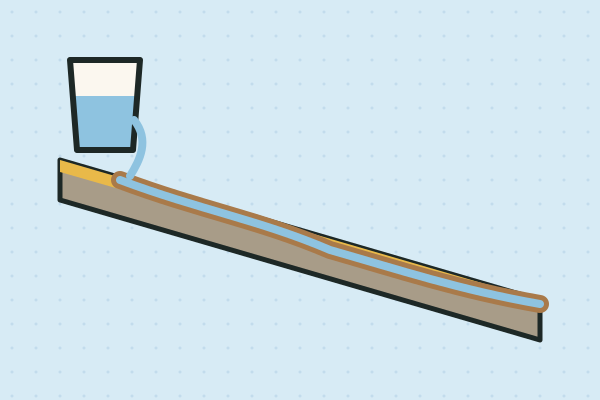 Lesson 2 · 50–60 minCan water carve a canyon?Students build a stream table in a foil pan of damp sand, let a steady trickle of 'rain' run down a gentle slope and a steep one, and measure the channel each time. They use the measurements to explain how running water carves valleys and canyons and drops sand where it slows down.
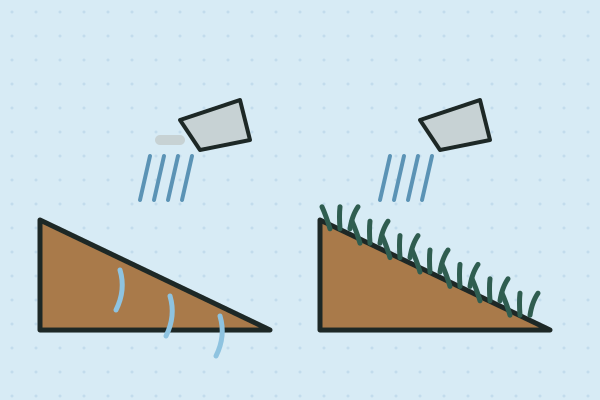 Lesson 3 · 55–60 minWhat protects a hillside from washing away?Teams build model hillsides of soil in foil pans, some bare, some covered with leaves or mulch and some held together with string 'roots', then make it rain on each one the same way. They measure the runoff and the mud it carries, and recommend the best way to protect a real slope.
 Lesson 4 · 50–60 min, plus a 5 min check the next dayHow do rocks become sand?Students shake sugar cubes in a jar for set times and measure how their sharp corners wear into rounded grains, then watch frozen water push a plug out of a sealed straw. They explain how tumbling and ice break rock into smaller and smaller pieces, all the way down to sand.
Materials for the whole unit · one list, lesson by lesson
Lesson 1: Are all rocks the same?
- Six different rocks, about walnut size (schoolyard, garden or a bag of mixed landscape rock)1 set per team
- Limestone or white marble chips (garden centre landscaping chips)1 per team, as one of the six
- Unglazed white ceramic tile (use the rough back of a bathroom tile)1 per team
- Steel nail, about 5 cm (2 in)1 per team
- Copper-coloured coin (a penny from a coin jar works)1 per team
- White vinegar in a small cup, with a dropper or plastic spoonAbout 30 mL (2 tbsp) per team
- Magnifying glass1 per team, if you have them
- Seashell or clean eggshell, to show a sure fizz1 for the class
- Safety glasses1 per student doing a test
- Paper towelsA few per team
About $20 for a class of 30, if the school has safety glasses
Lesson 2: Can water carve a canyon?
- Disposable foil roasting or lasagne pan, about 30 × 23 cm (12 × 9 in)1 per team
- Play sand, damp (two 20 kg / 44 lb bags for ten teams)About 1.5 L (6 cups) per team
- Paper cup with one small hole near the bottom, for the 'rain'1 per team
- Measuring cup or a cup marked at 250 mL (1 cup)1 per team
- Books or blocks to prop the pan3 per team
- Ruler1 per team
- Toothpick or wooden skewer, for measuring depth1 per team
- Bucket for used water, and towels or newspaperA few for the class
About $25 for a class of 30 (the pans are reused in Lesson 3)
Lesson 3: What protects a hillside from washing away?
- Foil pan, about 30 × 23 cm (12 × 9 in), from Lesson 21 per team
- Topsoil or garden soil, damp (not potting mix, which floats)About 2 L (8 cups) per team
- Covers: dry leaves, grass clippings or bark mulchA large handful per covered pan
- Cotton string or yarn, cut into 20 cm (8 in) piecesAbout 15 pieces per 'roots' pan
- Paper or plastic cup with about 8 pencil holes in the bottom, for rain1 per team
- Clear plastic cup, about 500 mL (16 oz), with 50 mL marks2 per team
- Measuring cup1 per team
- Small scoop or plastic spoon1 per team
- Books to prop the pan, ruler, newspaper or traysPer team
About $10 for a class of 30, reusing the pans from Lesson 2
Lesson 4: How do rocks become sand?
- Plastic jar or container with a tight lid (peanut butter jar size)1 per team
- Sugar cubes8 per team (one box does the class)
- Paper plate, divided into four parts with a marker: 0, 1, 2 and 4 minutes1 per team
- Ruler with millimetres1 per team
- Magnifying glass1 per team, if you have them
- Clear plastic drinking straws (not paper)1 per team
- Modelling clay or plasticineA grape-sized ball per team
- Water and a dropper or squeeze bottleFor the straws
- Permanent marker1 per team
- Freezer (staff room is fine)Overnight
- Optional: classroom chalk broken into 2 cm (¾ in) piecesA few pieces per team
About $12 for a class of 30
Across four lessons, students handle real rocks and real dirt. They sort a set of rocks, then test them like geologists, with a scratch test, a streak test and a drop of vinegar. They carve a canyon in a baking pan of sand and find out how slope changes it, protect a model hillside with leaves, mulch and string “roots”, and shake sugar cubes in a jar to watch sharp edges wear into rounded grains. A straw of frozen water shows how ice can split rock.
By the end, students can tell weathering (breaking rock down) from erosion (carrying the pieces away), back up a claim with measurements, and explain the landforms around them, from a gully in the schoolyard to a river valley, as the work of water, ice, plants and time. Every lesson uses dollar-store, hardware-store and garden-centre materials, and the pans from Lesson 2 are reused in Lesson 3.